We are getting closer and closer to that time of the year where it is no longer so much this year as it is next year… or perhaps that this year has become last year… you follow?
Well, people like to attach ritual to these things and from where I’m standing there sure as heck isn’t anything wrong with that.
The ritual I am of course referring to is partying. Hard. In as ridiculous a manner as is humanly possible. Or… perhaps partying somewhat adjacent to the human realm?
What I’m trying to say is, my friend Sabi and her family tend host the most gloriously themed costume parties to welcome the new year and this time around they’re going for “Angels and Demons”.
Now, if you know anything at all about me it’s probably that I love to make costumes and am physically incapable of passing up invitations to costume parties. Ever. To give a bit of an idea of what to expect; last year’s theme was “Circus” and I attended as a motherfucking LION:

NYE 2012-2013
While the year before was “Egypt” and I tried my best to be a pretty dancing girl:
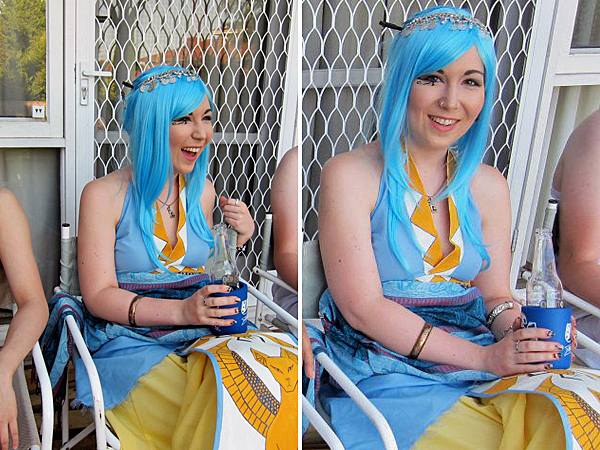
NYE 2011-2012
No matter the theme, deciding what to be takes a bit of thought- and this year? Something about the word “demons” got me wondering if it would be realistic to make a Baphomet costume.
Being mostly naked and simultaneously embodying full male and female genitalia it was deemed “probably not really appropriate for an event where there are likely to be people who don’t know me well. Also fuck wings.” But! The ball was at least rolling.
Strip back the Baphomet and there is a goat. Goats (or humanoids with goat-like features) are often used as symbols for devils and demons. So I felt pretty keen on the whole goat thing because making horns and cloven hooves seemed like legit fun, even if it is going in more of a pagan faun direction than full-on Baphomet.
To begin on my journey of capra metamorphosis the first step was creating horns.
I would like to take a moment to thank all of the DiY Homestuck cosplayers out there for their horn tutorials. There are so many variations for size, shape, materials and methods of attaching them to your head that it’s damn near impossible to not find something which suits your needs!
My horns have a core of newspaper, shaped with aluminium foil.
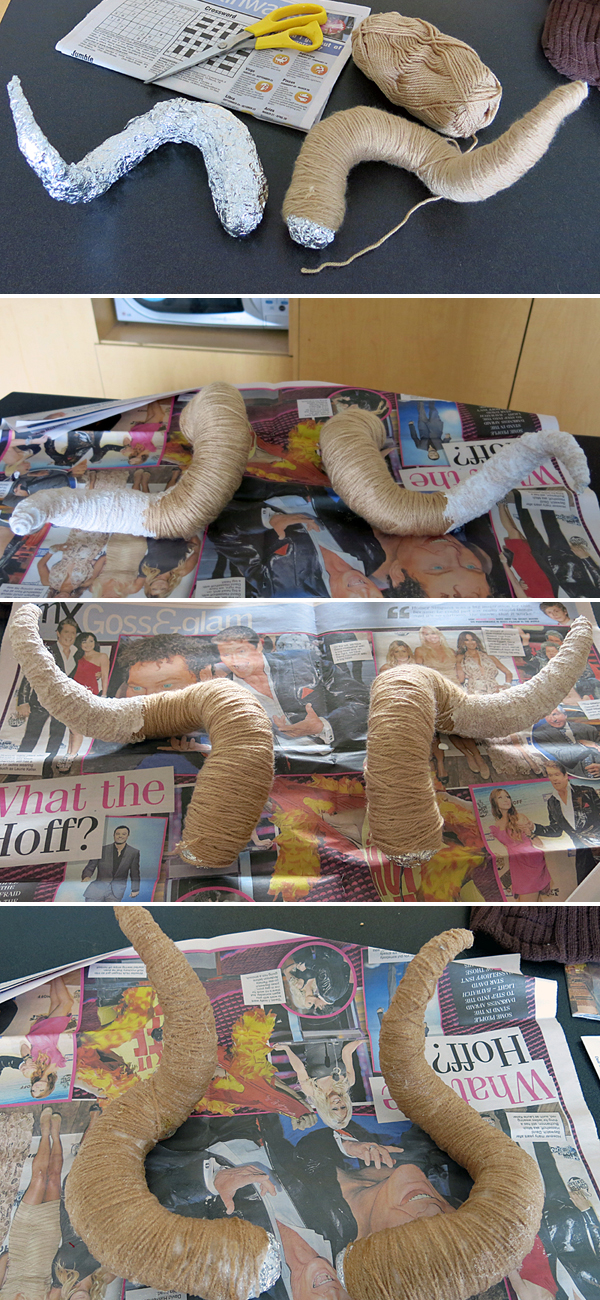
Each horn is approximately 40cm (16 inches) long.
This was then wrapped in acrylic yarn and coated with PVA glue.
Some people seem to be under the impression that adhesive tape was used somewhere in the construction of these- that is not the case.
No forms of adhesive tape were used in the construction of this costume. At all.
The newspaper is shaped purely with aluminium foil and texture added solely by wrapping the acrylic yarn around. PVA glue was used to hold the yarn in place and to give it a relatively solid coating.
This method was chosen because I did not want to spend money on the project; all of the materials are items which were already on hand around the house.
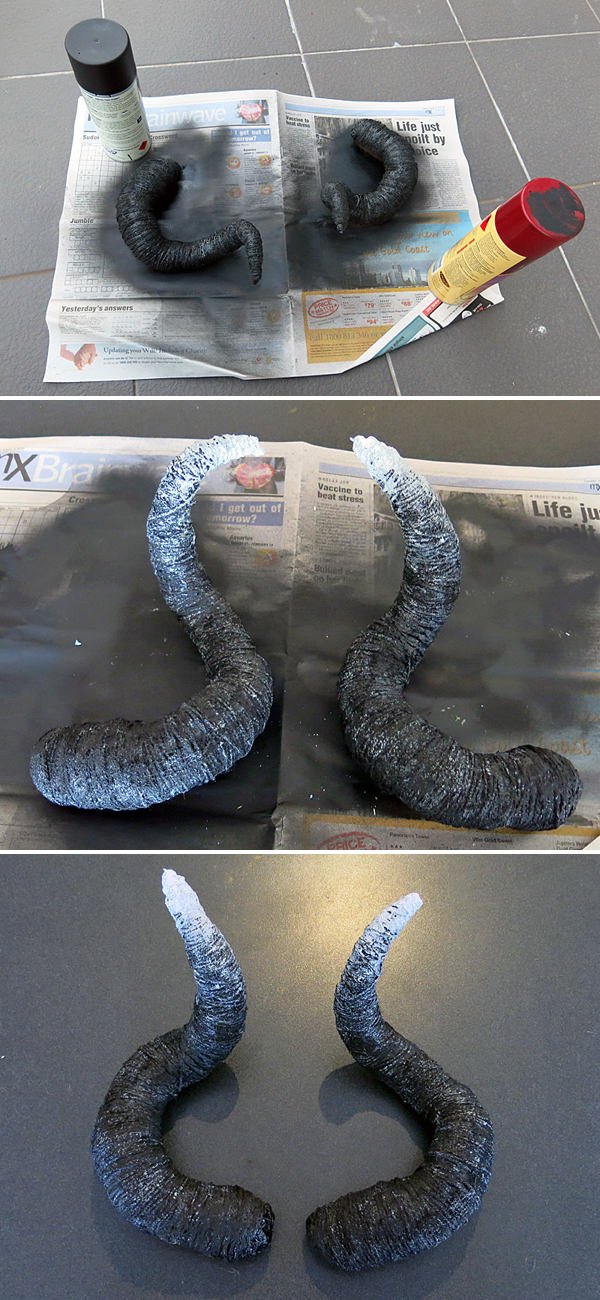
Painted horns.
Once dry they were painted with several coats of matte black enamel spray, left to dry again, white details sponged on with acrylic paints, more drying, and finally finished with a matte sealant spray.
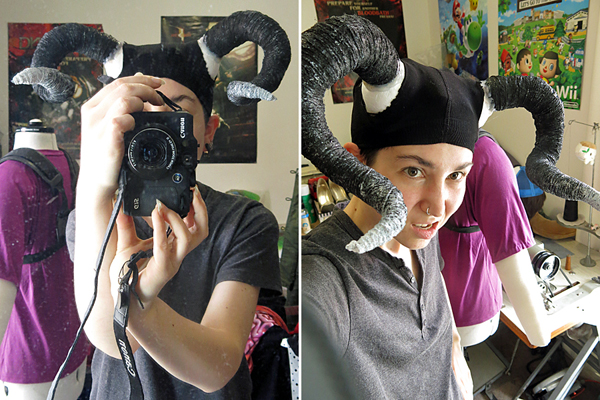
Sure, I could’ve just purchased a hat, but ugly opaque tights that I never wore were already in the closet.
The horns were next attached to halves of a polystyrene ball and inserted to the crotch of a cutup pair of opaque tights (something like 300 denier? They’re pretty thick, maybe even more leggings than tights) with much PVA and hot glue. A thin sheet of craft-foam was attached inside the makeshift cap adjoining the two foam-ball halves for stability.
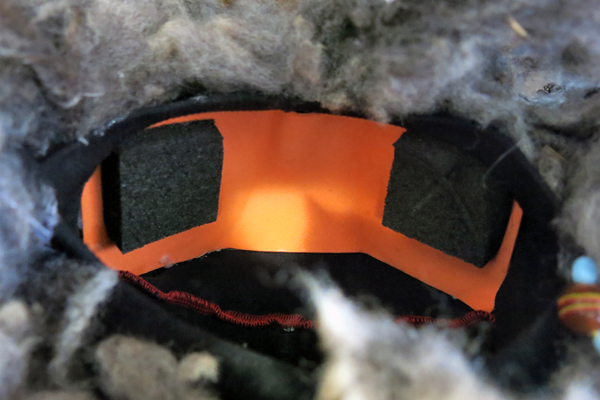
The soft black foam squares are for padding where the horns sit against the head.
Part of me wants to say that the horns are “very light weight” but truthfully I did not weigh them individually and besides that- have very little experience with horns anyhow (previous experience being limited to nubby plastic Vantas horns, which can be read about in more detail here). What I will say is: they are surprisingly comfortable to wear. You certainly notice that they’re on, but they don’t cause any notable discomfort (such as itching, cramping or headaches) and they don’t weigh down the head-cap. The only real hassle is being aware of their size and avoiding knocking them against things- which all comes down to time and practice.
Like anything, hey?
Experience is subjective. Results may vary. Reality may vary.
With the horns all snug in a crotch-hat it was time to let the wool part commence.
It just so happens that my parents keep pet sheep (no goats at the moment unfortunately but beggars can’t be choosers), one white named Stella and one black named Betty (after the song), and often have a surplus of wool available.
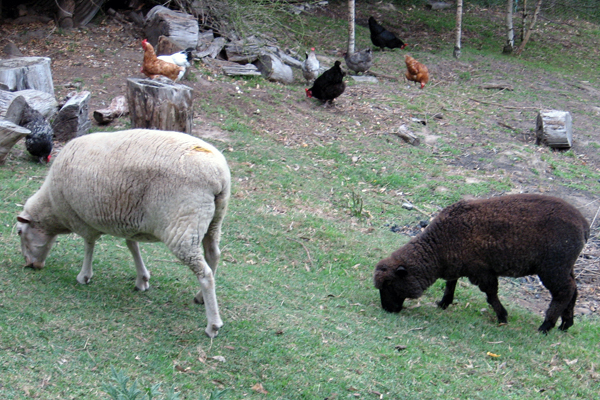
Wow, this is an old photo! Betty was still a lamb, she’s actually a little bigger than Stella now.
I nabbed a couple of bags of Betty’s wool (washed, but not brushed), being black, it gets sun-bleached throughout the year as it grows, leading to some interesting grey and ginger tones (Stella’s straight-up white felt too plain for this particular task, and I wanted to keep things on the hellishly cheap, so dye was out of the question).
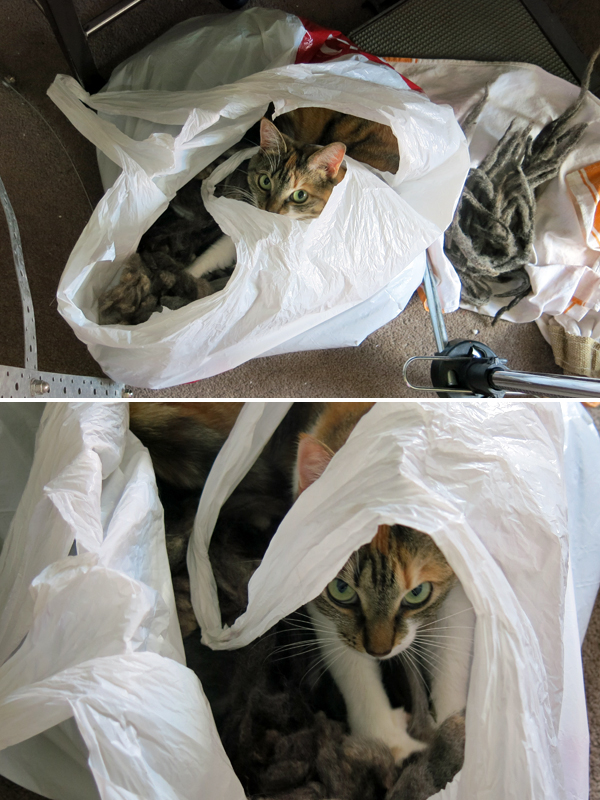
The Helpercat™ was pretty taken with the bags of wool.
Using hot water, cold water and olive oil soap I felted about half the wool into messy dreadlocks, then got bored and turned the rest into horrible nasty mats- which actually worked out pretty well with what I was going for.
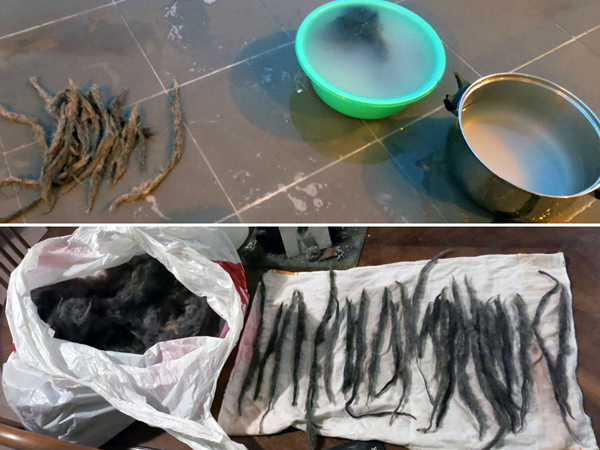
It had been some… 4 years? Since I last felted anything. Mangled my hands something fierce in the hot water. Due to that and a not-entirely-unrelated incident involving glue, I have henceforth been banned from society.
The felted wool then had to dry pretty thoroughly for a few days (or less, it’s been pretty warm recently, and you know you spend too much time at home when you actively think about “good drying weather”).
Then it was time to attach it to the cap, all around the horns.
At this point I want to take a moment to thank all of the DiY Cats cosplayers out there. Your wig tutorials really helped out with how to attach the wool; in fact, Cats wig tutorials also helped in the decision to use cut up stockings for the cap and real actual wool instead of something synthetic (though having easy access to free wool didn’t hurt there either).
Back to the task at hand; The big mats of wool were great here, because they all came out in these random organic shapes. They were able to be manipulated and layered around the horns and contours of the head in a very natural way, then smaller pieces and individual dreadlocks could be utilised to plug up any gaps.
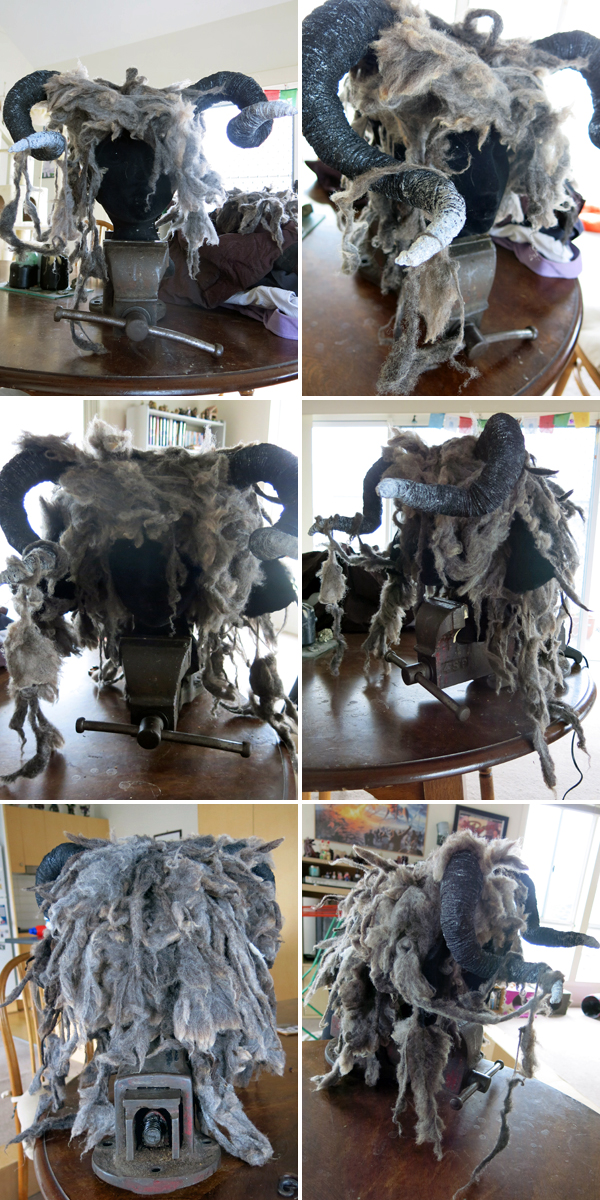
You may be shocked and appalled to learn that the wool was all attached to the headpiece using hot glue.
Lastly, some shiny adornments were added.
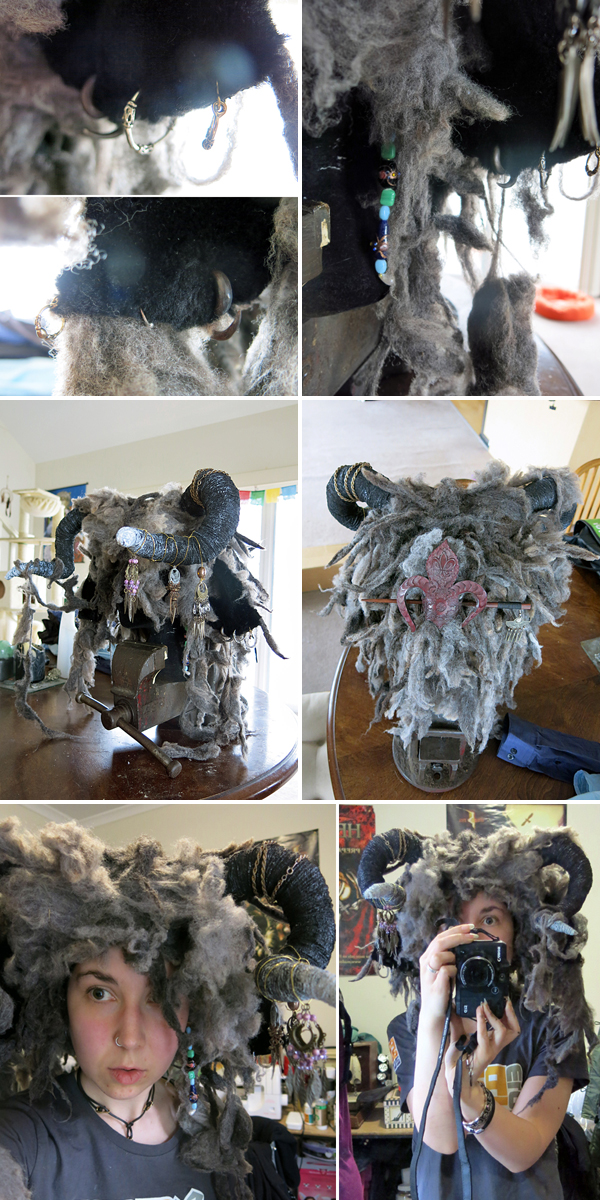
The ears are leftover black faux fur from a past project, backed with some of the felted mats.
All up the entire headpiece weighs in at around 550 grams and seriously, I’ve worn wigs which were heavier, more cumbersome and less comfortable than this.
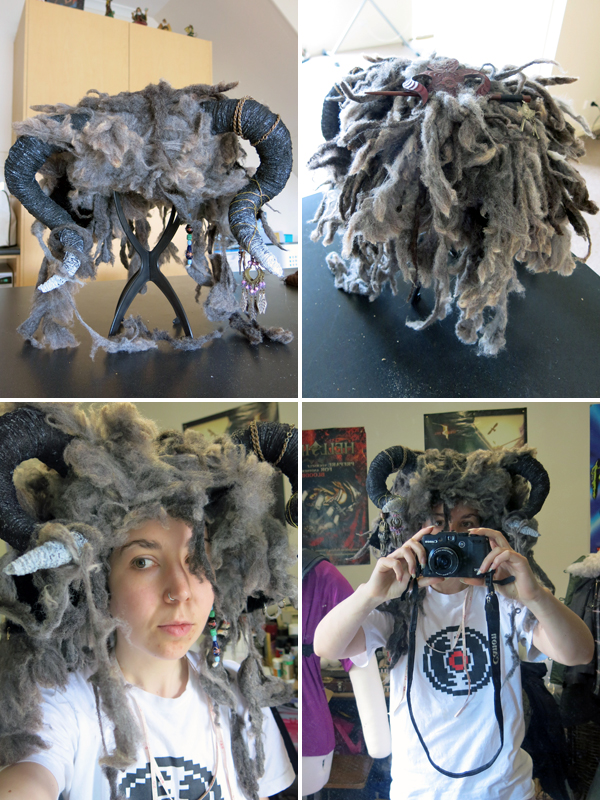
Even when not being worn or displayed it holds its shape well, making it very easy to put on and remove.
Don’t go thinking this headpiece marks the goat as finished; he still needs hands and feet before becoming a feature of the gallery- or any upcoming New Year celebrations, for that matter.
Maybe make some clothing too, but that all depends on time.
Let’s not pretend like there aren’t any goat-appropriate garments residing in my wardrobe already.
