It isn’t exactly a secret that I’ve been wanting to rework my Commander Keen costume after busting him out for PAX Aus 2013 for the first time since 2011- and as of the recent Melbourne Zombie Shuffle, this has clearly been a successful endeavour.
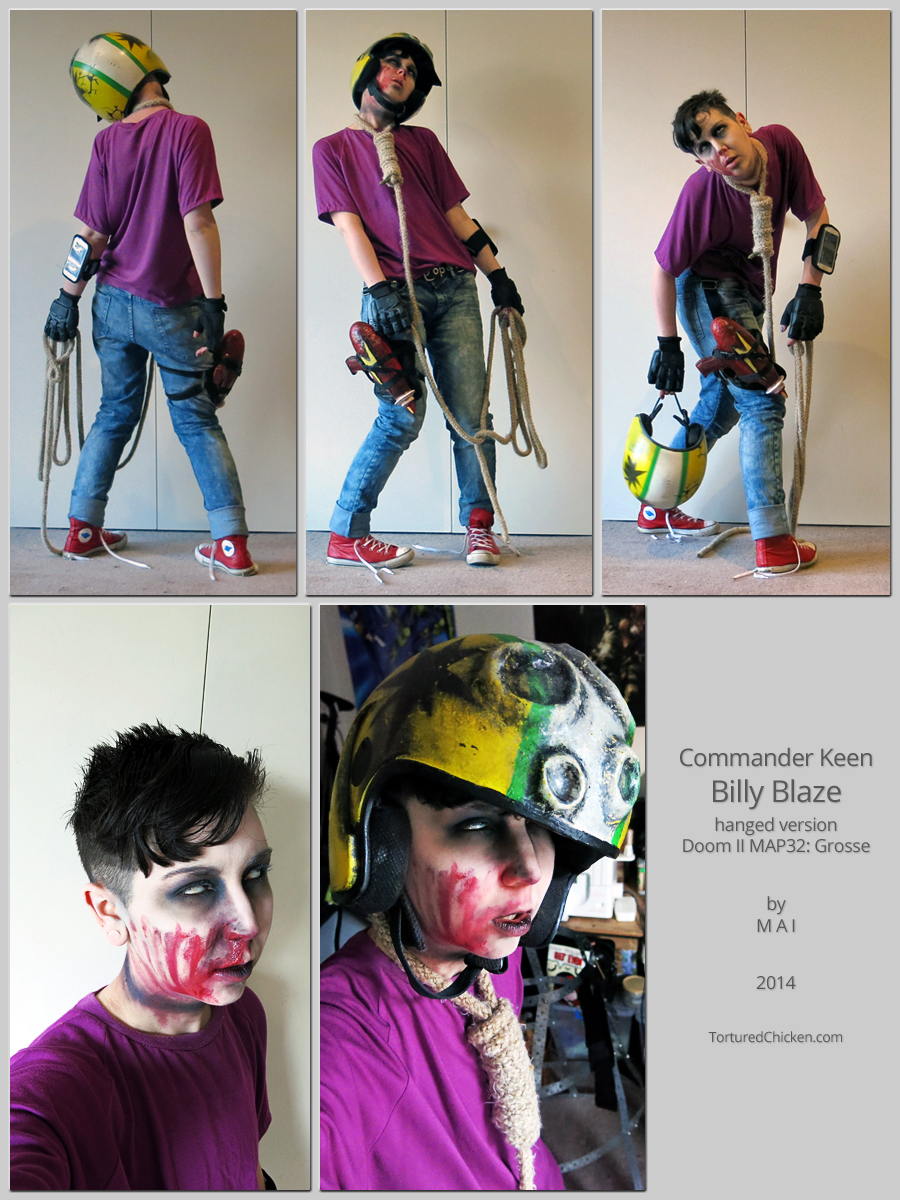
Hanged Keen in reference to Doom II – MAP32: Grosse.
Though zombie-Keen didn’t carry a pogo-stick since it is heavy and the ‘Shuffle, being a physical event, tuckers me out more than enough even without 5kg of steel awkwardly strapped across my back. Then again… if I’m worried about knocking the thing into people, it’d probably be even worse in crowded convention spaces.
But we’re not here to question my vague attempts at logic.
Starting from the ground and working our way up, Commander Keen version two wears 7-eyelet Converse Chuck Taylor style canvas sneakers. The Dunlop Volleys version one wore were too long for my feet and I also felt that the soles were much too thin.
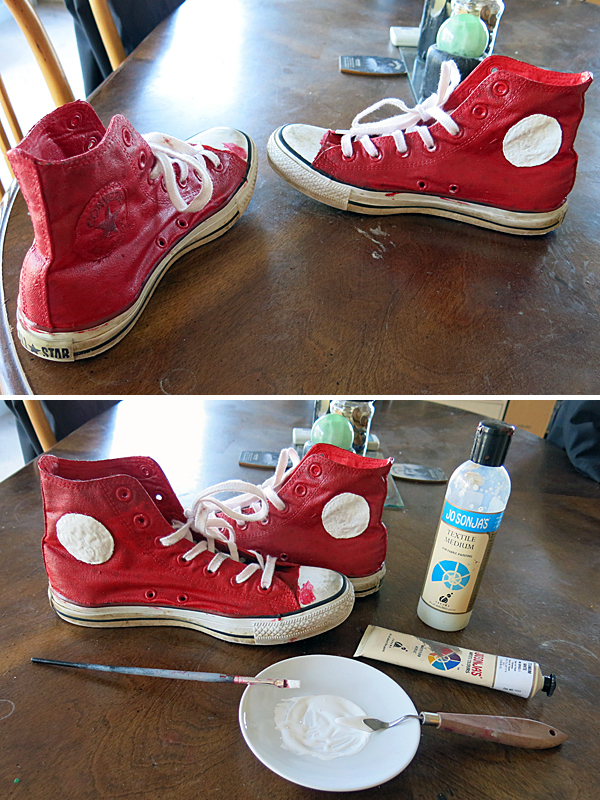
Painted Converse Chucks.
The Chucks are second hand, originally they were pink with black polka-dots and belonged to my mother. Absolutely I could’ve just gone out and purchased red Chucks, but free shoes are free shoes and I can barely afford to feed myself, let alone splurge on branded footwear already had leftover red acrylic paint and textile medium on hand from some older projects anyhow.
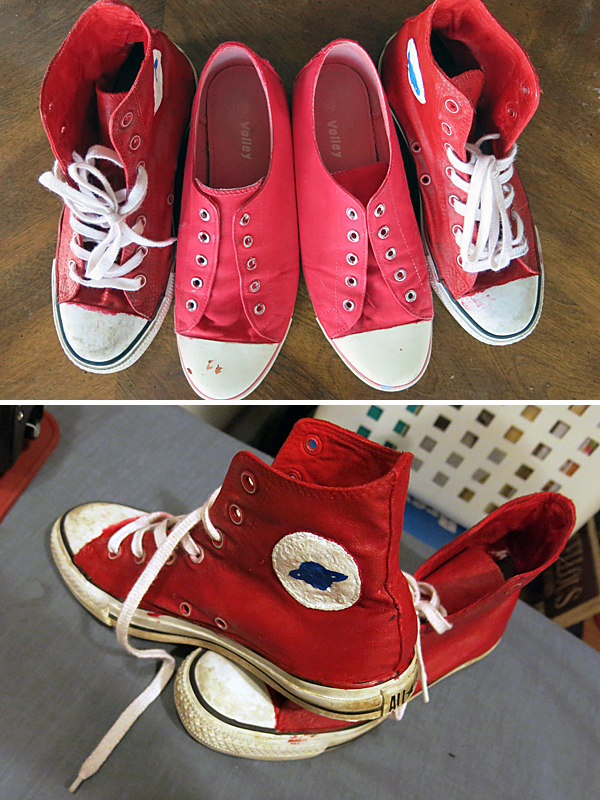
Remove the laces, paint the shoes, sand the paint off the eyelets, then iron. Painting shoes is straightforward, ironing them… not so much.
Once the red paint was dry and ironed (the textile medium was heat-set, so needed to be ironed to properly bond with the fabric), the circular labels on the inner ankles were painted white. These too were then dried and ironed before painting on the blue ringed planets. This idea was taken from the Commander Keen episode 6: Aliens Ate My Babysitter box-art illustration, where Billy Blaze’s trousers are shown rolled up to the tops of his sneakers revealing planet decals.
Part of the fun in reworking this costume without any time constraints is the interpretation of the character. Version two has taken inspiration from fanart, box-art, in-game menus, and my own ideal of what Keen could have looked like in a more modern game, or as a teenager, while sticking to his distinctive colour scheme and accessories. Bringing the character “to life” I suppose.
It has been a liberating experience.
But I digress.
Paint all set the shoes were washed (just thrown straight in the washing machine), dried (in the sun- I rarely, if ever, use tumble driers), and re-laced in white (the original laces having been pink).
Being old and a bit worn out I also slipped in some stylish blue insoles, picked up from a Daiso dollar store, for comfort.
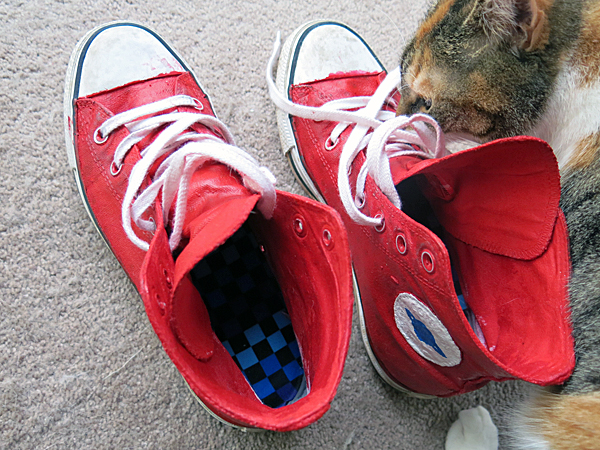
Blue insoles to match the planets on the ankles.
Then I just went for long walks wearing them every day for a couple of weeks because you do not want to be wearing shoes in for the first time at an event (unless blisters are your thing maybe, I’m not here to judge).
That was pretty much it for the footwear.
Working our way up, the trousers are the same faded blue jeans as last time, and purple top the same one that’s been used since the start (though the neckline has been fixed up since then, but I don’t think it’s particularly noticeable to outside observers).
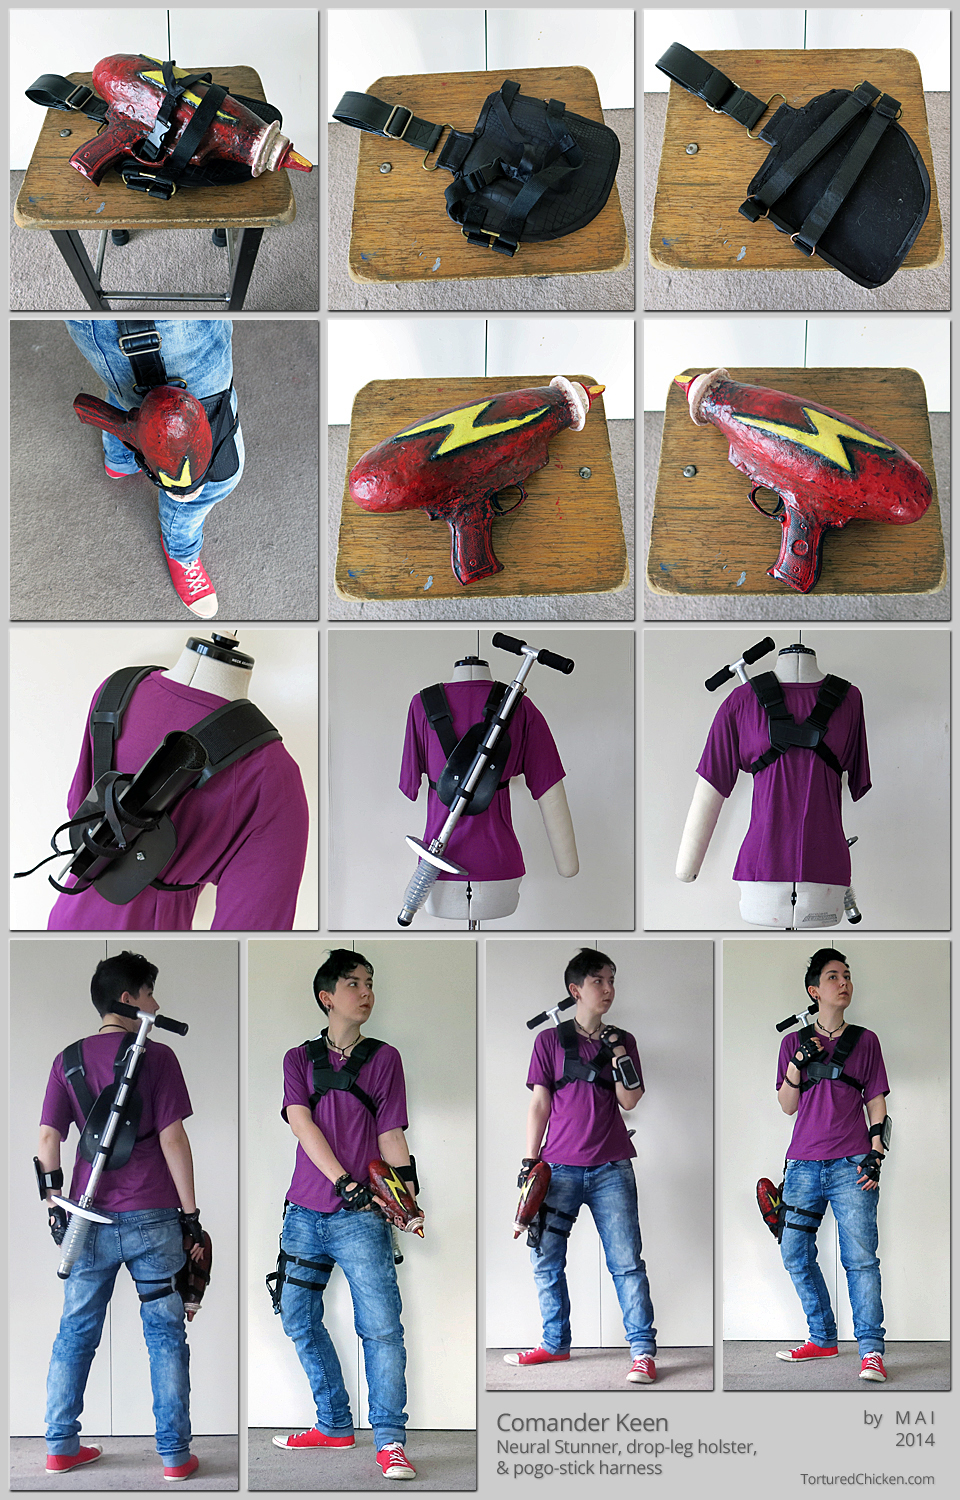
The new Neural Stunner is based on the gun Keen is shown holding during the title screen of episode 6.
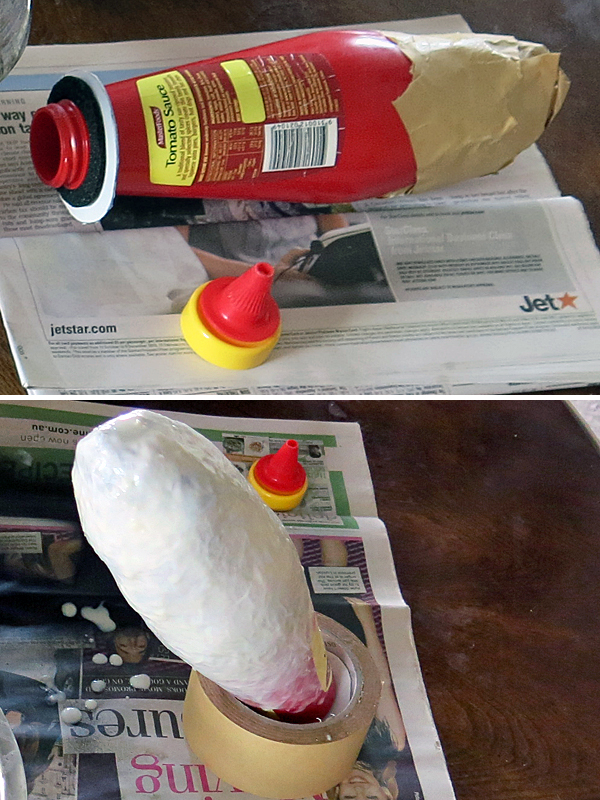
Neural Stunner
It was made out of a tomato sauce squeeze bottle.
The rings around the opening were cut from cardboard and foam, then simply slipped on there.
The end was flat, so I built a more rounded shape off that with scrunched up newspaper and masking tape. The entire thing was then covered in a base of tissue paper and PVA glue, left to dry thoroughly for a few days, then coated with a layer of soft clay.
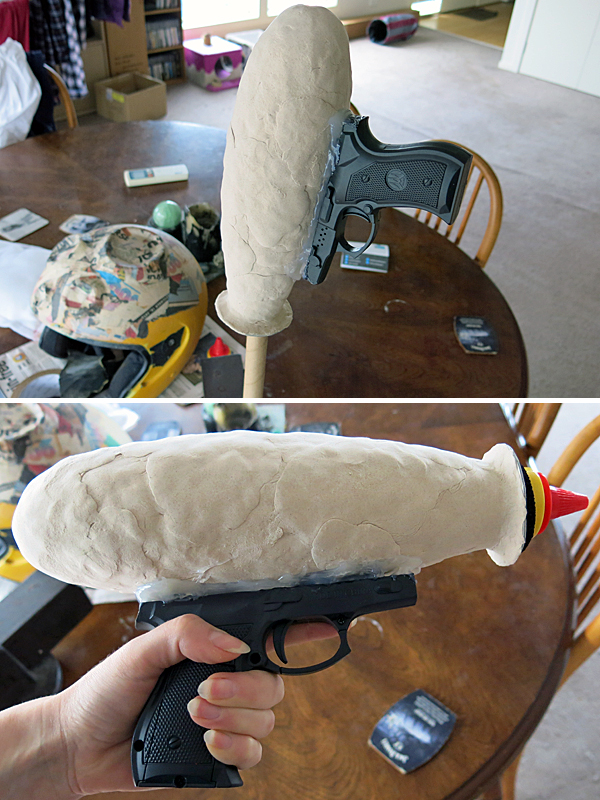
Clay coating sauce-bottle base.
While the clay was drying the grip and trigger were added. These were simply cracked out of a cheap toy gun which had been dismantled for the occasion and reinforced with hot glue.
Once the clay was dry and gun-frame securely affixed, several layers of newspaper and glue went on. Followed up by several more layers of a viscous concoction consisting of PVA glue, tissue paper, flour, sugar, salt and water all whisked together. Each of these glue layers were left to dry overnight and sanded down before adding the next.
It got sticky, to say the least.
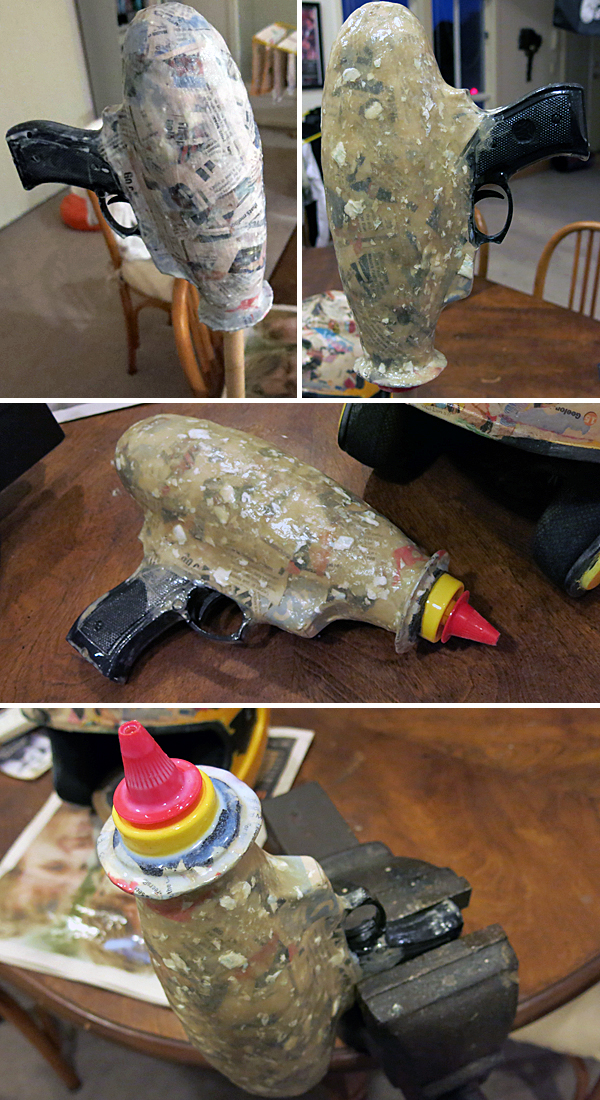
The nozzle was the final piece to be attached prior to painting. It doesn’t unscrew any more.
When the final glue layers had dried completely the entire thing was sanded down, coated with an all purpose sealer, then given the once over with a matte sealant spray just for good measure.
As for painting, my plan initially was just to attack it with the spray enamel in varying degrees of black, white, red, gold and yellow, but the gold and yellow on the lightning bolt didn’t really work out the way I’d hoped and the enamel felt too shiny. So instead I went for alternating layers of spray enamel and sponged on acrylics. Layering the matte acrylic paints with the shiny enamel, and sanding layers (in particular the red layers, to reveal the black underneath) really helped to bring out that well worn look I was aiming for.
Rather than being painted on the lightning bolts were carved from 5mm craft foam and affixed to each side via hot glue, then painted in gold, yellow, and black to blend it into the base.
Once the glues were all dry and paint detailing to a point I was happy with, it was time to finish the weapon off with a last coat of my favourite matte sealant spray- and think about ways it might be attached to my leg.
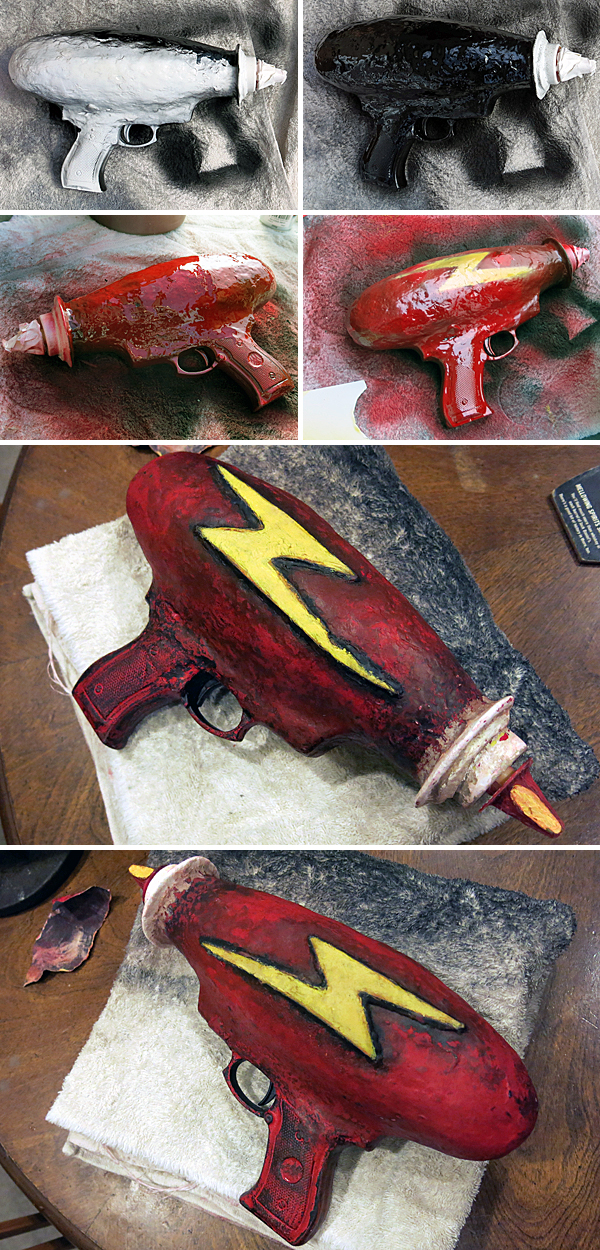
Painting the Neural Stunner.
The Neural Stunner used in version one was just a cheap water pistol which could be slipped through the belt loops on my jeans. The new one is a little too heavy for that, so a neat little drop-leg style holster was whipped together out of old lanyards, bag straps, and scrap fabrics.
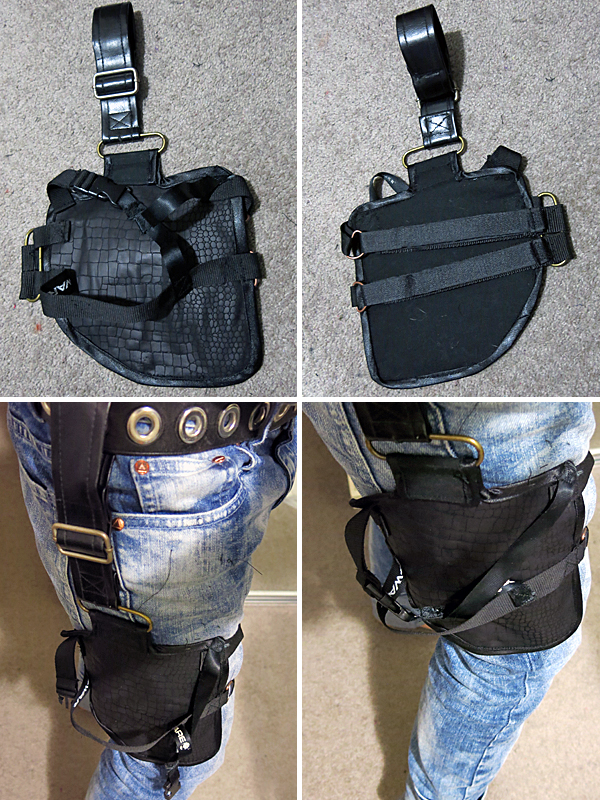
If Billy Blaze can make space ships out of broken vacuum cleaners and stolen car-parts, then damn it I can make functional holsters out of literal rubbish!
It attaches to the right leg with one strap looping about your belt and two more around the thigh.
Rather than using a pouch, straps hold the gun in place. This way all the effort that went into detailing the thing is, y’know, visible.
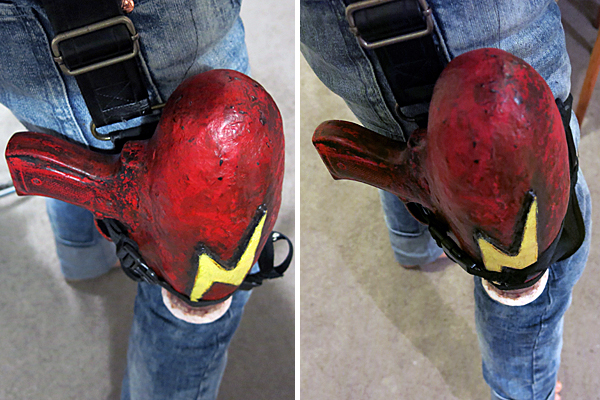
At first I was clipping the straps through the trigger guard but in the case of a functional weapon (which this is not) that would be a disaster waiting to happen. More recently the clips have favoured hooking over the back instead.
From the Neural Stunner we work up to the pogo-stick, which was completely absent from version one of the costume (and purely aesthetic in version two; though the stick is certainly functional, it has a 60kg weight limit which somebody as uncoordinated as myself should not put to the test).
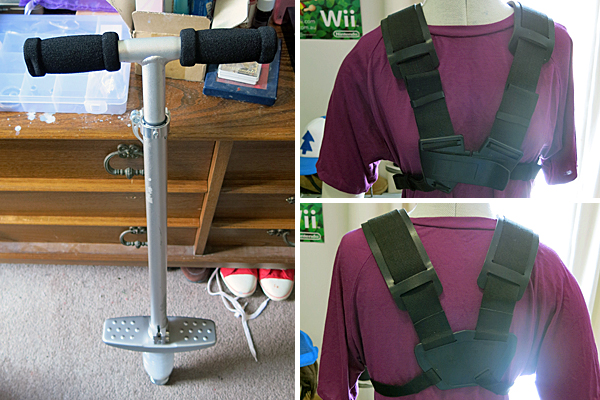
Picked up from an Aldi supermarket when they had them in stock as a part of their weekly specials.
No alterations have been applied to the pogo-stick in of itself, the real fun here is in how the item was affixed to my back.
The use of props can really make a costume, especially with something as distinctive as the connection between Commander Keen and pogo-sticks. The trouble with props is that they take up valuable hand-space. Particularly with something heavy like a pogo-stick. Maybe not such a problem for an organised photo-shoot, but in the convention scene it means fussing around with bags, cloak rooms, cars, and trying to organise a reliable handler willing to look after you (and/or your items).
A drop-leg holster keeps the Neural Stunner out of my hands, so who’s to say an old brush-cutting harness and some mouldy PVC pipe couldn’t do the same for the pogo-stick?
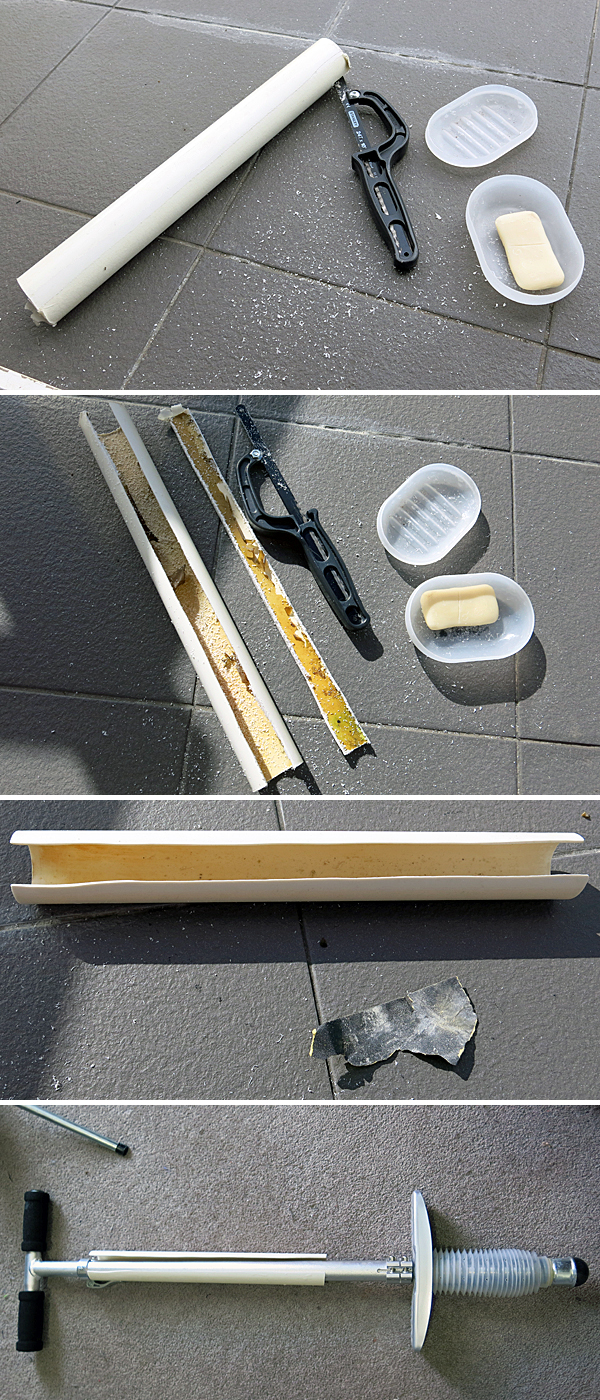
Okay, so it was probably some kind of dried up dead algae rather than mould but you know what I mean.
It’s been kicking around for years now but it finally happened. With special thanks to my father, not least for giving me the harness and digging old pipes out of unused swimming pool filters; but also for sourcing the helmet from one of his motorcycle club chums and heck, even the wrist band in which my phone is stashed! This costume may never have happened without his input- and that’s not even bringing up the fact that he’s the one who purchased those games and allowed me endless hours of computer time to play them in the first place.
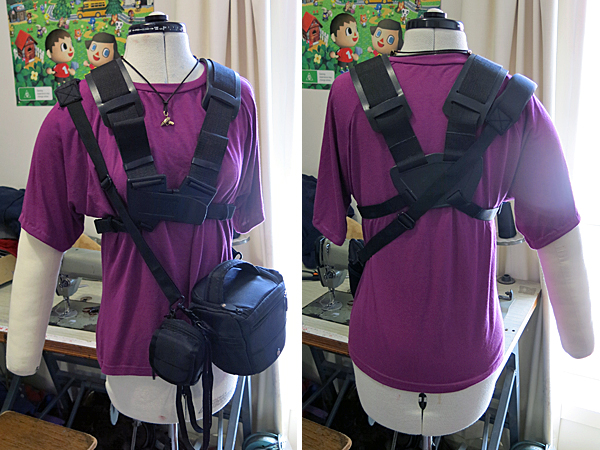
It really has been years; he gave me the harness when I originally made the TF2 Medic as a possible means for attaching the medipack. It proved unsuited to that particular task and even though that was in 2011 (the same year version 1 of Keen was put together), it wasn’t until much later that I realised Mr. Blaze could use it for his pogo-stick.
Once the pipe was cut to size and in my possession the outside was thoroughly scrubbed and a slot marked along the length just slightly narrower than the diameter of the pogo-stick.
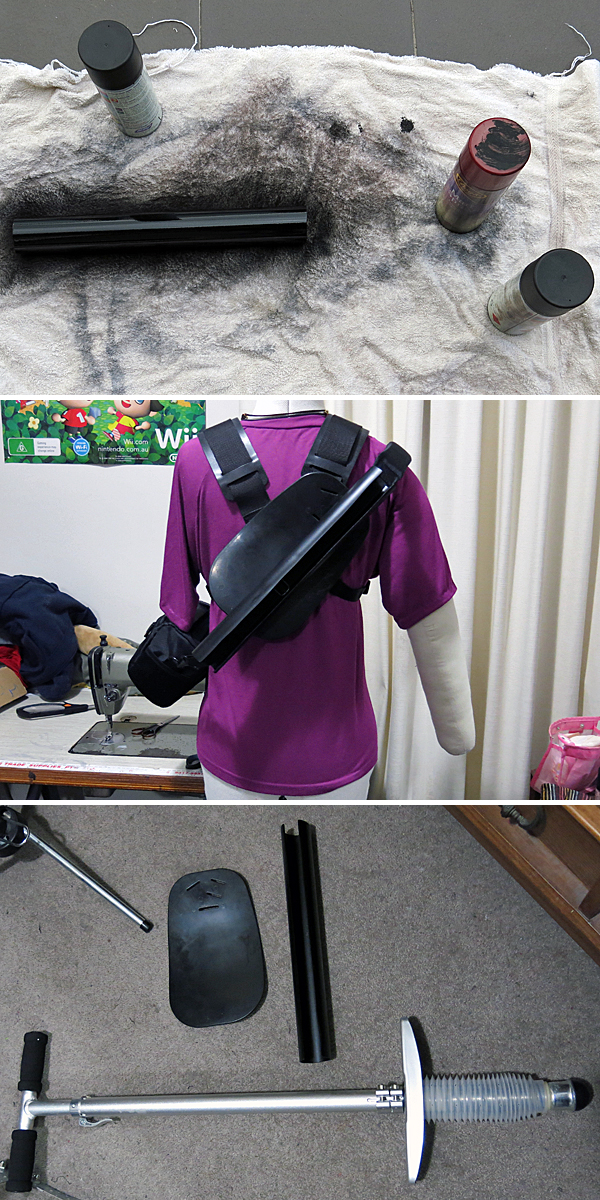
Which I think was about 2.5-3cm.
Happy with the positioning the slot was sawn out, inside scrubbed thoroughly of the grime I was previously unable to reach, edges thoroughly sanded, then the entire thing sealed, sprayed with some coats of black enamel, sealed again, and returned to my parents house because I possess neither a drill nor adequate space for hard labour.
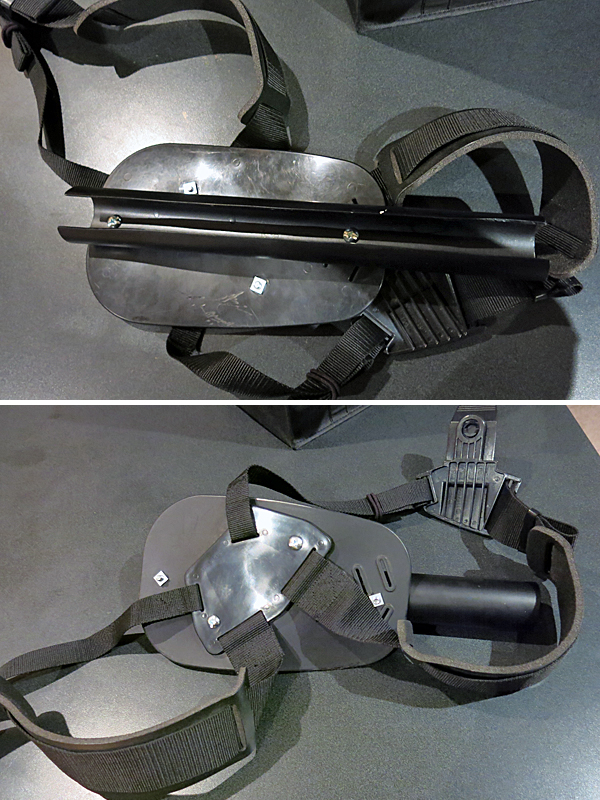
PVC can apparently get a nasty sharp edge on it (hence the thorough sanding to dull it down), my hands got cut up pretty bad while scrubbing the thing out. So just be careful of that.
Basically, with the harness, there is a hook and a guard panel where the brush-cutter would ordinarily attach, which were both removed. The hook was discarded and guard-panel bolted to the centre back panel of the harness as a brace for the pipe.
The PVC pipe was then bolted to the larger panel ready for the pogo-stick to slot in.
Personally I was pretty willing to just wing it, so yet again I’m going to say some extra special thanks to my father, who not only measured and drilled the holes, but fitted it to my back, double checking between each step, so that the pogo-stick would be evenly balanced across both shoulders.
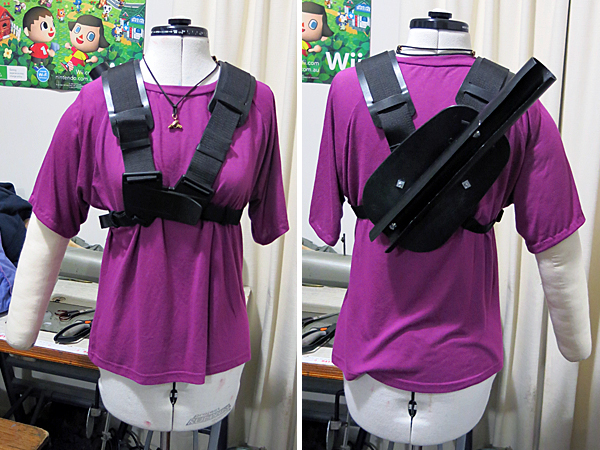
The centre back panel itself was far too small to adequately position the pogo-stick.
We were both genuinely impressed with how well it came out; at this point it could easily have been called “finished” in a pinch, as the pogo-stick clipped in perfectly and was so comfortably balanced.
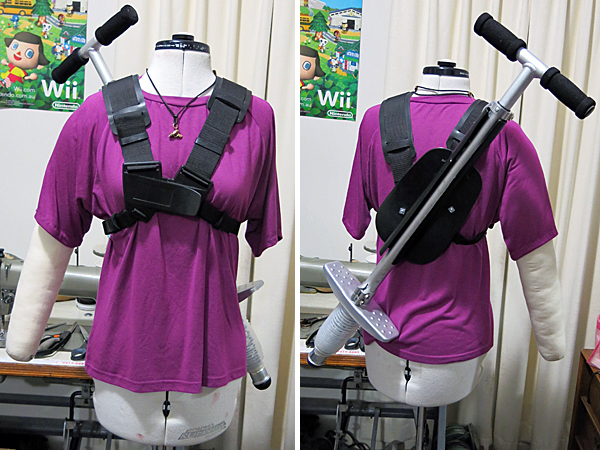
But there were still a few minor details needing attention.
Back home a number of squishy foam squares were adhered to the inside of the pipe, these cover the bolts so that they don’t scratch up the pogo-stick and also serve to fill excess space while gripping the stick so it doesn’t shift around at all (though that ended up pretty much being a non-issue anyhow).
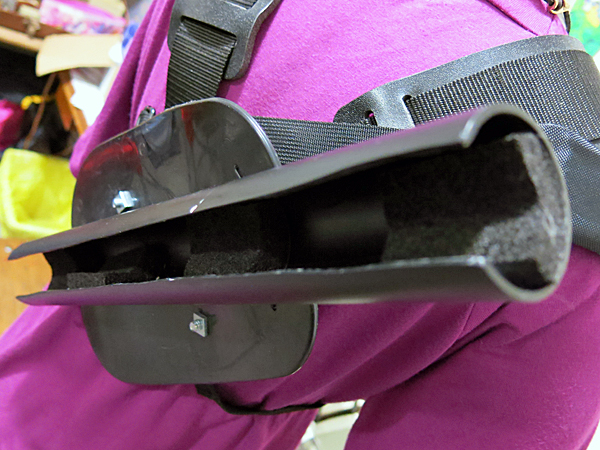
Foam squares inside the PVC pipe.
Finally, three Velcro straps were added to the outside of the pipe which wrap around the pogo-stick. Preventing it from falling out wasn’t really a problem in the end, but the straps just offer a bit of confidence- serving as a deterrent from anybody who might attempt to grab at the stick against my wishes.
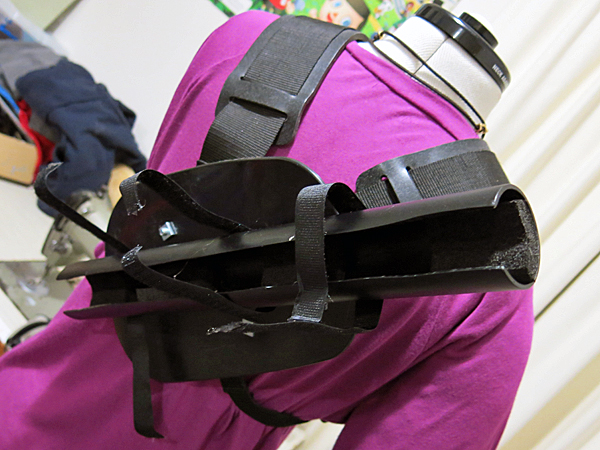
People seem more inclined to grab at cosplayers when they can sneak up from behind, so added security is never not a good idea.
Removing the stick while wearing it is a cumbersome task, putting it back even more so. This prop is more about aesthetics than practicality and was a huge success in that regard.
Though he’s yet to make a debut in terms of the convention scene (Zombie Shuffle doesn’t count), I have worn the costume around the house a handful of times to get a feel for it. While it will no doubt be tiring for a full day (cosplaying always is), and I’ll certainly need to be aware of people and objects around me so as not to bump them with the stick, it is surprisingly comfortable and the way the harness is balanced is no better or worse than simply wearing a backpack. Which is much preferable to something weighing down on one shoulder as you’re entirely less likely to wind up with a muscular strain.
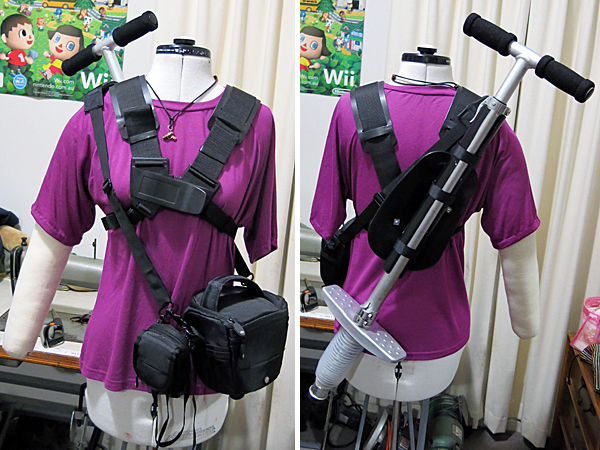
Seriously though, somebody at the Zombie Shuffle asked where my pogo-stick was and I ignored them because it just wasn’t a conversation I was willing to have with a stranger at that point in time.
Lastly, the helmet, a costume piece so distinctive to the Commander Keen character that without it the rest of the costume would pretty much be a moot point.
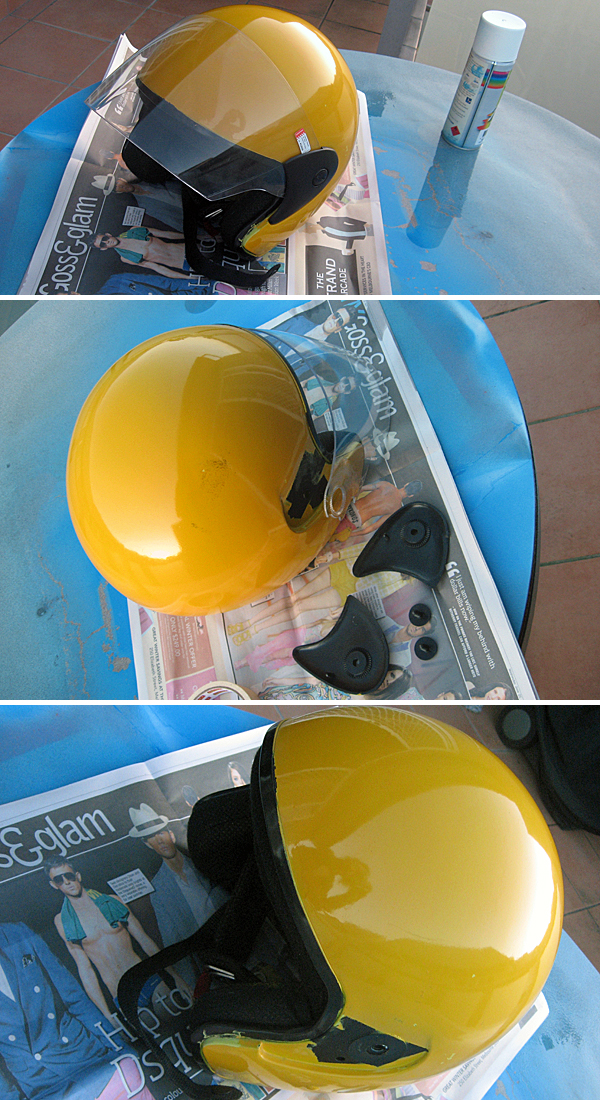
Canonically Keen wears a Greenbay Packers gridiron helmet, so it should be noted here that mine is an open-faced motorcycle helmet because I don’t understand sport.
This is the same helmet as was used for version one, just with a more complete makeover than it received initially.
It seems fitting to mention that the name of the gentleman who donated this helmet was, in fact, Helmet.
Originally I’m told the helmet was black, but had been painted yellow to match one of the previous owner’s motorcycles.
For version 1:
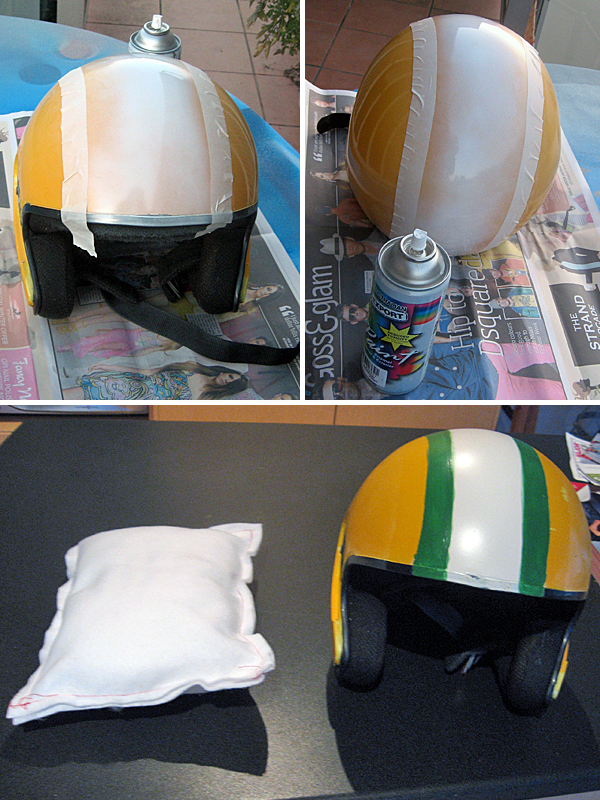
- The polystyrene padding was removed so the helmet (which fit me quite well) would appear too large in size (as young Billy is said to have “borrowed” the helmet from his older brother), and fashioned a smaller padding cushion from acrylic felt stuffed with poly-fill for comfort.
- Removed the visor via the large plastic bolts on either side (underneath which remnants of the original black paint was visible).
- Then painted green and white stripes straight on there.
It did the job in a pinch and at the time that felt okay.
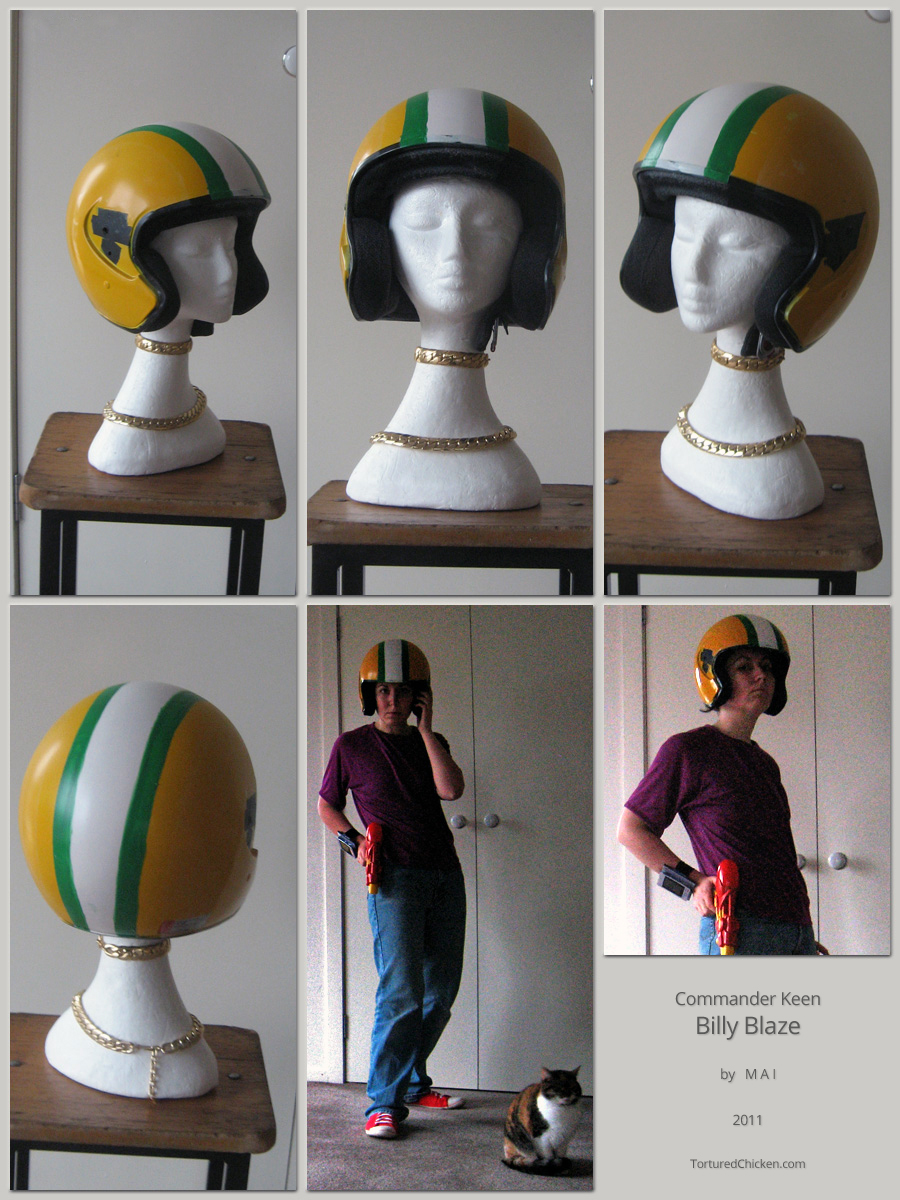
Completed version 1 of my Commander Keen costume, from 2011.
But there was nothing particularly distinguishing about the costume. Just a desire to have something done by a certain date. Limited not only by time frames, but funds, other priorities, and poor physical health.
Issues which at this point have been more or less negated.
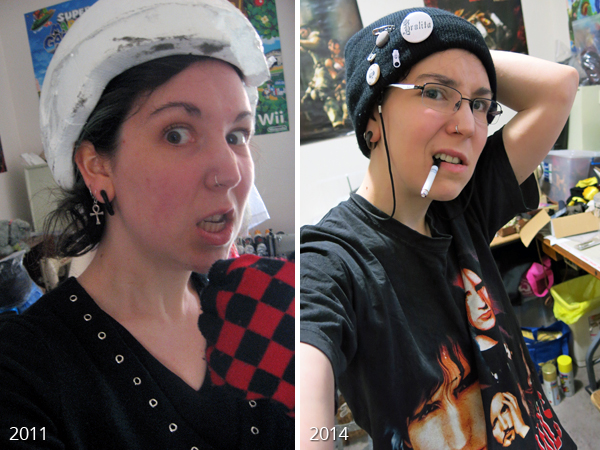
Selfies taken during work on Commander Keen costume versions 1 (2011) and 2 (2014) respectively.
Discussion point: How is it that I’m more teenage-boy now than I was then?
To begin version two, the helmet was sanded down and sealed, then some craters added using a soft clay purchased from Daiso dollar store (seriously, that shop is a cosplay life saver).
Once the clay was dry it was sealed again then layered with newspaper and some of that same viscous flour-glue concoction as was used on the Neural Stunner.
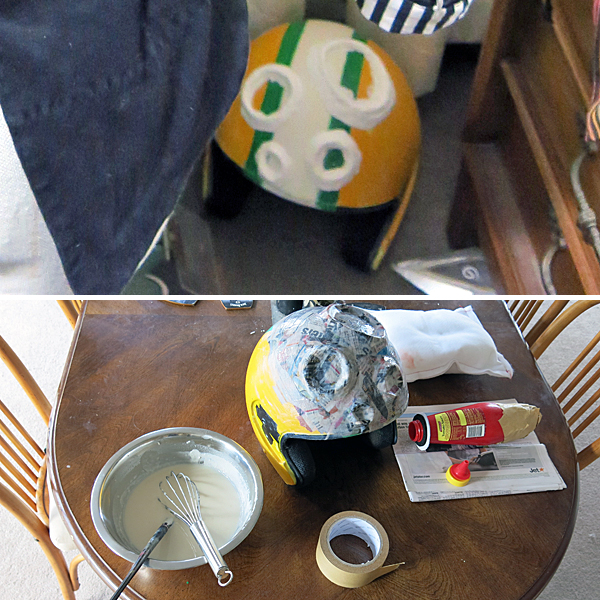
Textures. Lumps. Cracks. These are what we strive for.
The box-art, title screens, and story scenes in Commander Keen games often show the helmet as being quite damaged; cracks, craters, scorch-marks; it really felt like a way to give the costume a bit more flavour.
So lumpy glue and paper was layered, dried, sanded, rinsed and repeated until I was satisfied. There wasn’t any particular goal in mind other than “make it look like it’s been to Mars and back.”
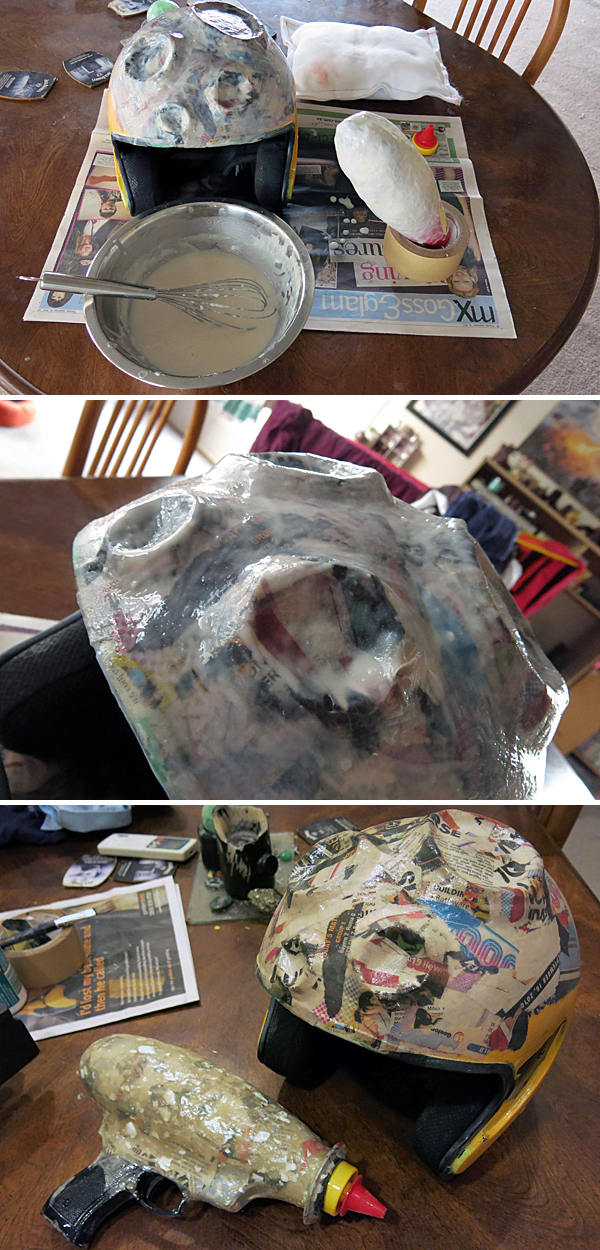
You can’t expect it to be in pristine condition, considering what this kid gets up to.
Happy with the sculpted portions, the opening was covered with masking tape and painting ensued. Starting with yellow because apparently reasonable base coats are for chumps.
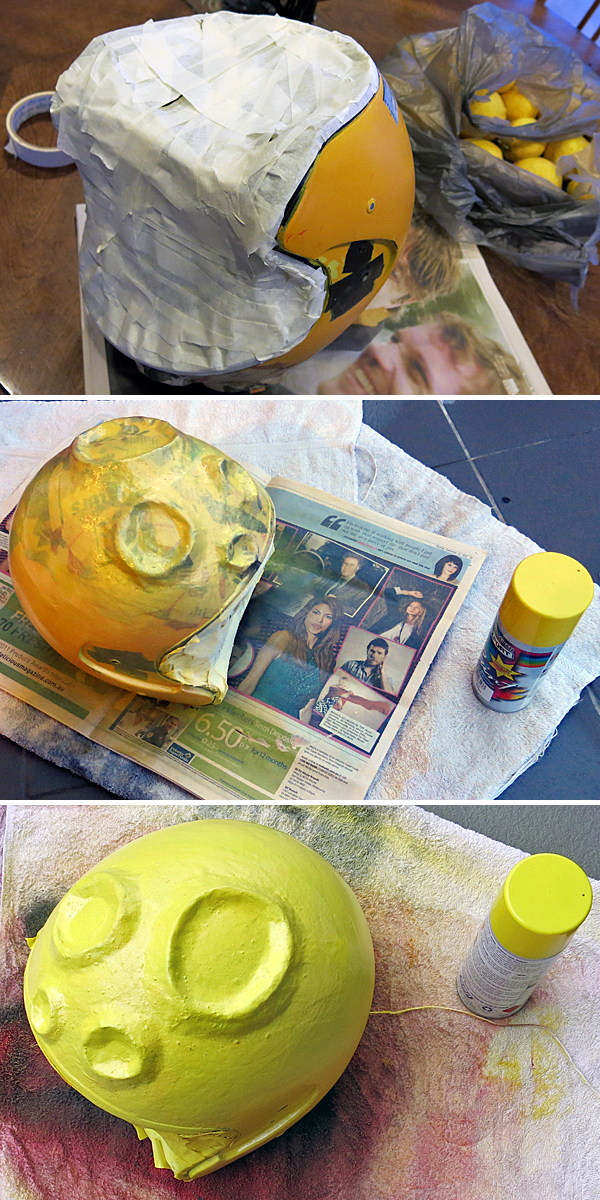
Base coats, who needs them?!
The paint was done in alternating layers of spray enamel and acrylics (using a sponge rather than a brush to avoid obvious stroke-lines, not that it seems relevant in hindsight, all things considered) being sanded down between each layer for that damaged/worn/aged aesthetic I was after.
With enough yellow piled on to cover any obvious newspaper articles, the sides were masked for the central white stripe, then centre masked for the parallel green stripes.
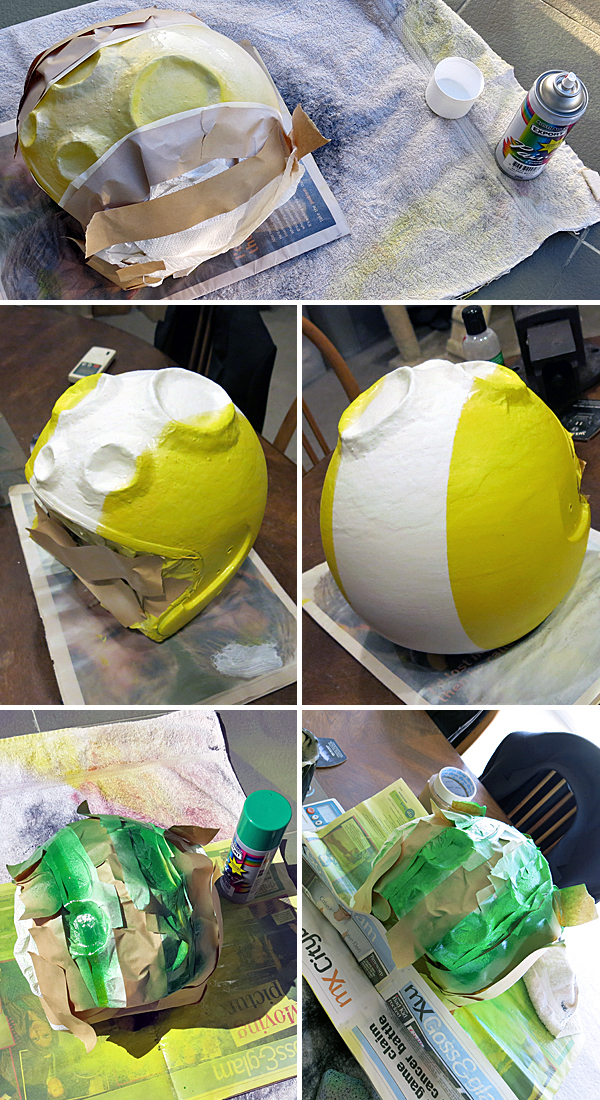
A more reasonable person may have started with the white as a base, but that’s not how I roll.
Happy with the stripes I set about shading and highlighting, using a sponge to lightly dab black, white and grey acrylic paints around the edges, still sanding each layer as it dried.
Black acrylic cracks were then brushed onto one side, with scorch marks added intermittently about the helmet using haphazardly cut paper templates and spray enamel in layers of black and brown.
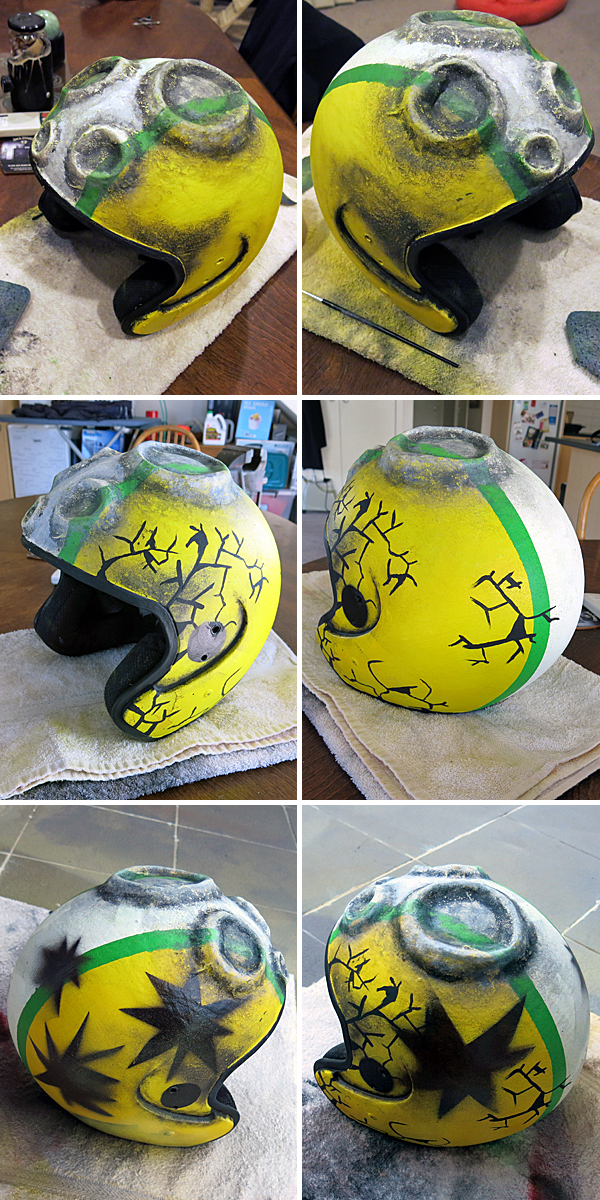
Not forgetting to keep on sanding and wearing everything down, of course!
Then it was thoroughly sealed (twice, just to be sure) and some regular old duct tape slapped over the cracks just for good measure.
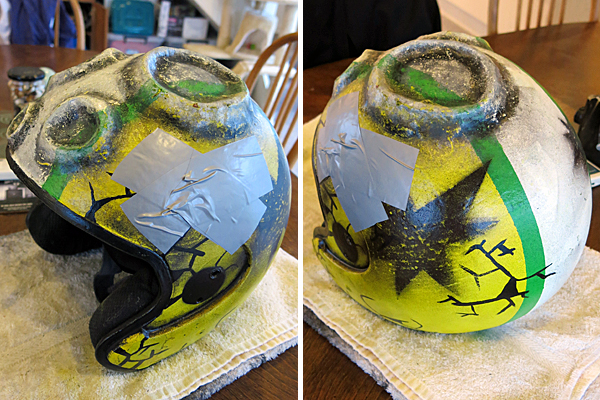
Because duct-tape makes everything better.
A coat of black acrylic paint was also licked over the inside, and a fully lined black cover whipped up for the padding cushion so it would be less visible.
At which point the costume could be considered complete!
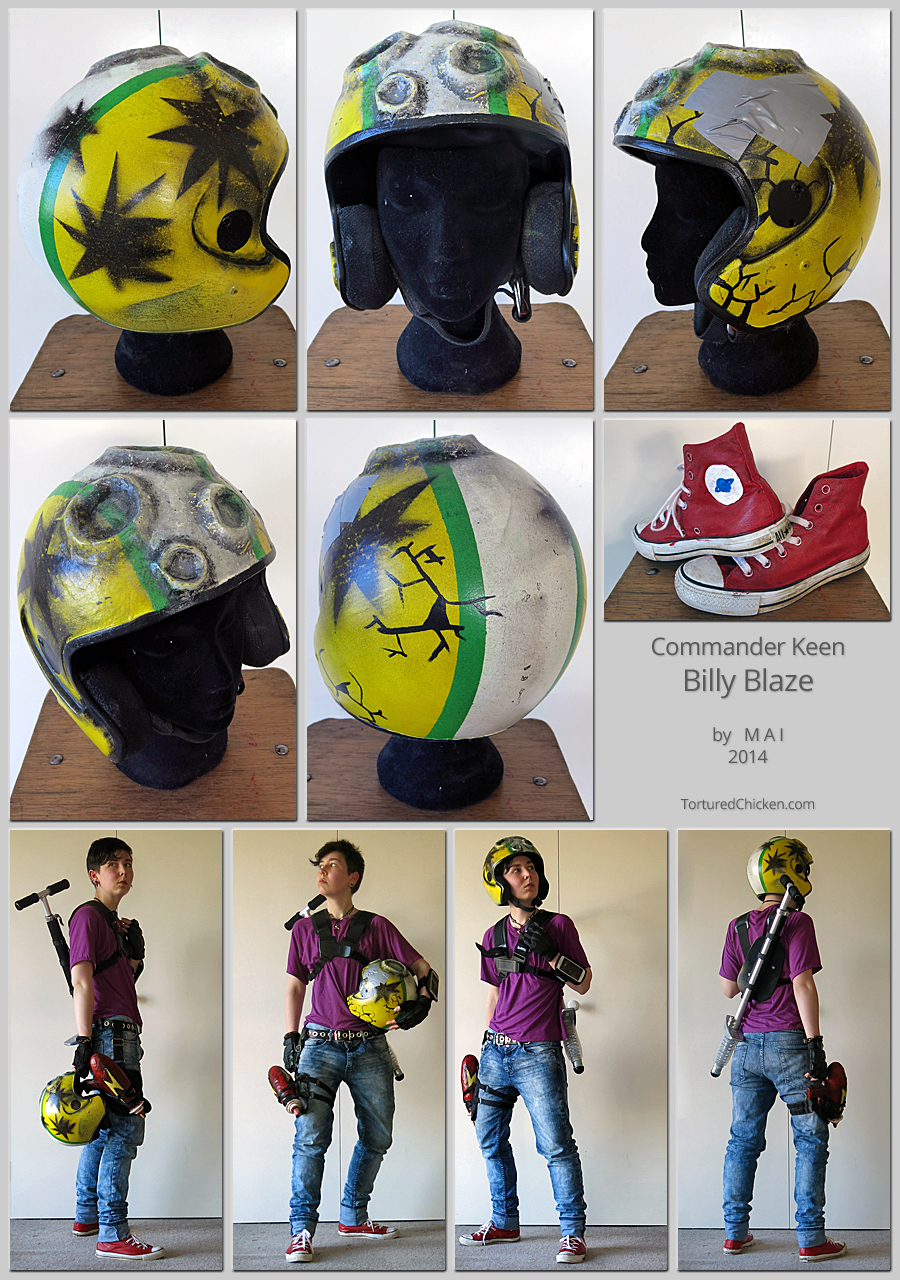
Viewable on the Clothing, Costumes and crafts page in the Gallery.
With a parting shout-out to the fingerless paint-ball gloves Tech Support gave me ages ago (which have been incorporated into many a costume) and my phone; which is worn slipped into the sort of armband joggers use to keep their portable music players in-check.
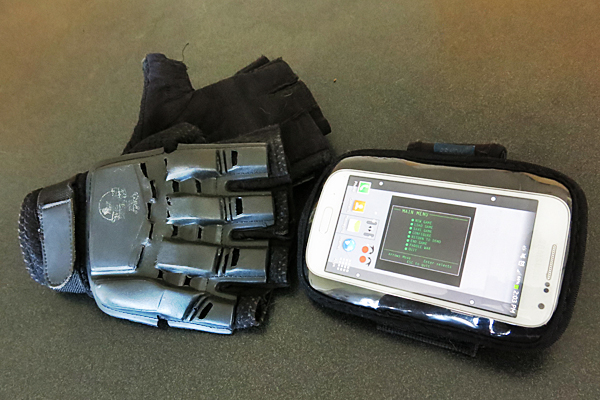
Samsung galaxy S4 mini and paint-ball gloves.
Same wristband as last time, new phone, same images that have been used since the start (with just a few minor adjustments to their proportions).
There’s something oddly reassuring about incorporating a functional telephone into a costume.
Ps. If you made it through all that, go listen to this. Or don’t.
